Showing posts with label dessert. Show all posts

Saturday, October 8, 2011

Afgan Biscuits!

Yum - even with watery icing!
At the school I used to work at in Singapore we used to have a fantastic "Mum's Canteen". The mum's that ran it were the best and they made great food that always made me homesick for Australia. My all time favourite treat was Afghan biscuits. Years later I shared this story with my mother-in-law who promptly found a recipe and now makes them for me every time we visit home. Thank you Sandy! 


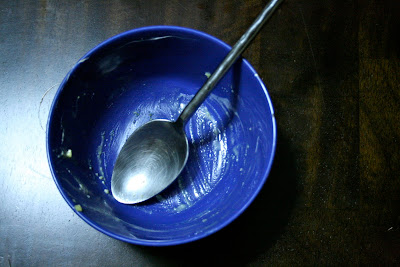
On this rainy Saturday morning I decided to make some Afghan biscuits with my 22 month son. We had lots of fun and obviously the best bit for him (and me) is licking the spoon at the end. He loved how crunchy the biscuits are and I just love them!


Keep your eyes on the mix!
Here's what you need for the biscuits:
200 g butter
1/2 cup sugar
1 1/2 cups plain flour
2 tablespoons cocoa powder
1 cup corn flakes, slightly crushed
1/2 cup desiccated coconut 


Here's what you need for the icing**:
1 cup icing sugar
1 tablespoon cocoa powder
2 tablespoons water
walnuts (to decorate if you want) 


Here's what you do:
Preheat oven to 180c and use baking paper to line some baking trays (I use pizza trays). When the butter is soft place it and the sugar in to your mixing bowl. I used my KitchenAid to cream it together until it was light and fluffy. In a separate bowl mix the flour and cocoa together. It is better to use a sifter but I am not sure if my son would have the patience for this so I just mixed them both straight from the packet. When mixed through add it to the butter and sugar mixture.


Lots of fun
Add the crushed cornflakes (my son had lots of fun helping with this) and the coconut to the bowl . Mix through until all blended well. Spoon teaspoon sized portions of batter onto your lined trays. It's important to know that the cookies won't spread or rise. If you want flat cookies be sure to press them down.  Bake in your oven for 15-20mins. This recipe made abut 24 small biscuits. When ready let cool then make the icing and ice. Traditionally afghan biscuits are served with a walnut decoration but also delicious on their own. Enjoy! 


**my icing turned out very watery. If you have a great recipe for icing please leave a comment and share!


Monday, May 23, 2011

Crustless Apple Pie with Cinnamon

Crustless apple pie
I've been making this apple pie since my son was about 7 months and he loves it, in fact we all do. Super easy and healthy I usually make about 4 pies and freeze them to use later.

I should be more adventurous and make one with a crust but I've already made a lemon pie and this apple pie works every time.


Cook the apples for 15 mins
Here's what you need:
6 apples, peeled & cored. I used Granny Smith.
1 egg yolk
2-3 cinnamon sticks
1/4 cup brown sugar
1 tbspn lemon juice
ground cinnamon

Here's what you do:
Mix in the egg & sugar
Preheat your oven to 180C. Cook the apples in boiling water with the cinnamon sticks and lemon juice until soft (about 15 minutes). Drain well and add the apple to your food processor. Mix to the consistency you like, I puree it all.

Add in the egg yolk and sugar and mix again. Pour mix into 4 ramekin dishes, about 2/3 high, even out the surface and sprinkle with ground cinnamon. Bake in the oven for 20mins. When cooled, cover with cling wrap and freeze or eat straight away with ice-cream. Enjoy!

Tuesday, May 3, 2011

Coconut Chocolate Slice (egg free)

Won't last long
I made this slice to bring to lunch with friends today and also because it's one of my favourite slices. It is the first slice I ever made as teenager. I have no idea where the recipe comes from but I haven't changed it throughout the years. I was tempted to add some crushed cornflakes just for a change but I just love it the way it is. Apparently the recipe makes 30 pieces but I tend to cut the slice into bigger portions and it is usually all gone in 2 days! This recipe made 24 pieces (well ok, about 28, but there are now 24 in the container).

Here's what you need for slice:
1.5 cup flour (I used self-raising, but have used plain before. I might use wholewheat next time)
1 cup brown sugar (you can use caster sugar too)
1/3 cup cocoa powder
1 1/3 cup dessicated coconut
240g, melted & cooled butter (it's important to let the butter cool before adding)
1 tsp vanilla extract

Pat the mix down evenly
For the icing:
2 cups icing sugar
1/3 cup cocoa powder
60g melted butter
2-3 tbspn hot water

Here's what you do:
Preheat the oven to 180C, grease & line a baking tray and melt the butter. Set the butter aside for it to cool. Mix all the dry ingredients in a bowl. Keep turning the mix over, making sure to blend the ingredients well. When the butter is cool add it and the vanilla extract. I stir the butter in for a bit but then use my hands to mix everything together. Use your hands to place the mix in your tray and spread out evenly. Bake for about 15-20mins, or place a toothpick in and when it's clean, take it out.

Leave the slice to cool completely, Make and spread the icing out and then sprinkle with coconut on the top. Cut into servings. I keep the slice in a tupperware container in the fridge due to the heat. If you have any variations to this recipe I'd love to know. Enjoy!

an old favourite

Wednesday, April 27, 2011

**Lemon Pie** (mum-in-law's recipe) DELICIOUS! DELICIOUS!

Seriously delicious!
As we live in Thailand throughout the year I create a list of all the things I will eat (and do) when we visit home, Australia, for our holiday. Definitely in my top 3 eat list is my mother-in-law Sandy's Lemon Pie. I seriously LOVE this pie and literally wait all year for a slice (or 5!). So I was excited knowing that Sandy was coming to visit us here in Bangkok and now that I have a food blog I decided to challenge myself and ask Sandy to walk me through the recipe. Keep in mind that I have NEVER, EVER, made pastry from scratch before but how hard could it be...


Here's what you need for the pastry:
200g plain flour
Oscar inspecting the pastry and filling
130grams butter (room temperature)
70g caster sugar
1 egg

Here's what you need for the filling:
4 lemons zested
250ml fresh lemon juice (from the ones you zested)
9 eggs
375g caster sugar
300ml cream

Here's what you do: (I tried to take lots of photos to document my experience)

Prepare the pastry and filling first thing in the morning. I prepared everything at 7:30am and then cooked it later the same day at 7pm. As I live in Bangkok though the humidity is so bad at the moment that it was better for the pastry to be made early. You can use your hands or a processor to make the pastry. I used my KitchenAid, Sandy always uses her Magimix.

Pastry #1: 
Combine the sugar and flour mixture and then add the butter. After about 30 seconds mixing, add the egg. Combine ingredients until it has formed a smooth dough. Take out of the bowl and roll in to a ball. Cover with cling wrap and place in the fridge for at least 1-3 hours or overnight if you wish. It will feel like it has turned rock hard but that's ok. This is the easy part I discovered!

Love my juicer
Filling:
Zest and juice the lemons (this was my least favourite part). I was happy to bring out my awesome juicer that we picked up in Turkey. Mix the eggs, cream, sugar, juice and zest all together. I used the whisk component of my KitchenAid. Pour mixture in a tupperware container or keep in bowl and place in the fridge for a few hours or overnight.

Pastry/Filling #2:
It's now 6pm so pastry has been sitting in the fridge for about 10 hours. Preheat your oven to 160C and take out the pastry ball and lemon filling. Generously flour a surface on your kitchen bench and gently pat and roll your pastry. Use a floured rolling pin, start at the centre to roll the pastry out into a circular shape a bit bigger than your pie dish. You might have to stop regularly and piece the pastry back together on the side. Make sure it's not rolled too thin and keep adding flour under the pastry to stop it sticking.

Oh dear...
Now... the tricky part!!! Carefully pick up your pastry and line a deep pie dish. As you can see from the photo I need a lot of help in this department! What a mess! We had a good laugh, blamed it on the humidity and set about piecing the pastry back together again. I knew there was a reason I have never made pasty before!

Patched all up, looks great


If you're lucky then yours would have stayed together nicely and ended up looking like this photo to the right. Now that the pastry is covering the base and edges of the dish, line the base with baking paper and bake at 160C. I covered the baking paper with pie weights (ceramic balls - gift from Sandy). Bake the pastry for about 10minutes, but maybe less, check on it and once it is slightly brown take it out of the oven, discard the baking paper and store the pie weights.

Reduce the oven temperature to 150C. You might want to use a sieve to pour your filling through before baking. Sandy sometimes leaves the zest in but sometimes sifts it out, up to you. We poured it through a sieve first. Evenly pour the lemon filling around the pastry but not up to brim, leave about 3/4 cm gap or a bit more from the top. If you have left over filling pour these into greased ramekin bowls and bake at the same time. These can be crustless pies! Now....so super carefully carry the dish to the oven.


Bake the pie at 150C for approximately 45mins-1hr. Mine cooked faster than I thought, check it by gently pressing the centre. It should be spongy and rise back when pressed.

Take it out of the oven and serve with ice-cream or just cream. Seriously delicious and no where near as hard as I thought. I felt like a Masterchef contestant afterwards and so proud of myself! THANK YOU SANDY! xoxo
No leftovers - ever!

Sunday, April 17, 2011

Chocolate & Cinnamon Wontons

Seriously tasty!
I think I have just found my new favourite dessert. After an early dinner and once Oscar was in bed I quickly decided to try a recipe I have been staring at for a couple of months in my Donna Hay: Fast, Fresh, Simple cookbook. I just love the look of Donna Hay's book and love turning through the pages.

I love dark chocolate and cinnamon but was a bit weary of the wonton mix. Well, all up it took me 10mins from start to finish and I am betting by years end I would have eaten more wontons than I can remember. The count is at 8 so far!


Here's what you need: (to make 16, I only made 8 so halved all ingredients)

16 wonton wrappers
40g melted butter
16 small squares of dark chocolate
1 teaspoon ground cinnamon
2 tablespoons caster sugar

Chocolate squares in place
Here's what you do:

Preheat the oven to 180C and line a tray with baking paper. Mix the sugar and cinnamon in a small bowl or cup.

With a brush (I actually used a new paintbrush as I didn't have a kitchen brush, must buy!)   coat the 3 edges of the wontons with melted butter and place a small chocolate square on one half. Place it close to the front edge as otherwise the when you close the wonton it won't seal properly. Fold over the wontons and press the edges together to seal.

Put the wontons on the baking tray, brush over with butter and sprinkle with the sugar & cinnamon mix. Bake for 8mins or until golden.

These were seriously delicious and my husband and i ate them so quickly. Serve with ice-cream, strawberries. Also, you could experiment with putting other treats in the wontons. On Donna Hay's site she has a recipe for Apple & Chocolate wontons - yum!

Smells so good... yum!

Saturday, April 16, 2011

Apricot, Apple & Pear Custard

When Oscar first started eating solid foods I went slightly crazy trying to find age-appropriate food for him to try. My sister passed on a few of her cookbooks and Annabel Karmel's New Complete Baby and Toddler Meal Planner soon became my baby cookbook bible. I cannot recommend it enough for new parents stuck for ideas and the custard recipe below is adapted from the book.

When I gave Oscar a taste this afternoon, he came running back saying, "mumma mumma" and helped himself to 5 more spoons. The recipe made 5 serves which I spread into small tupperware containers and have frozen for desserts or breakfast toppings.

Ingredients
What you'll need:

75g dried apricots
1 large apple, peeled, cored and chopped
1 ripe pear, peel, cored and chopped
1 tablespoon of custard powder
150ml milk (I use full-fat always but up to you)

Here's what you do:

In a small saucepan heat the apricots and apple in about 6 tablespoons of water and cook for about 10mins or until the apple is soft enough to break with a fork.

In a separate saucepan blend the custard powder with some of the milk over a medium heat and use a whisk to stir it to make a smooth paste. Mine went quite lumpy at first so it's a good idea to take it off the heat while stirring (according to my husband). Add the remaining milk and bring to the boil, keep stirring until it thickens and any lumps disappear.

Put the cooked fruit plus the pear in a blender (I use a Magimix) and blend to the consistency you like. I preferred mine with no lumps. Stir in the custard. I distributed the custrad to small tupperware containers and froze it. Enjoy!