Sunday, October 16, 2011

Old favourites

Spaghetti meatballs
With the rain keeping us in indoors we have been cooking toddler friendly food more often as it gives us something to do during the day! Oscar loves to help cut and mix but his favourite job is taste tester. This week we made the old favourite 'Spaghetti Meatballs' and some home made pizza using pita bread.

I've provided photos of the pizza making but have not listed a recipe as pizza is really a choose your own adventure. I love very plain pizzas but we added some yellow capsicum, mushrooms, ham, cheese and fresh tomato. Oscar had lots of fun making his pizza and the way he made it is the way we left it.

As for spaghetti meatballs, I make the meatballs different every time as it depends on what I have in the fridge. Below is the recipe I used for this time. It made about 35 small meatballs which I freeze.

Here's what you need:
400-500g beef mince (or chicken)
1 carrot grated
1/2 grated onion
1 tablespoon chopped basil
1/2 cup frozen corn, thawed
1 beaten egg
1/2 cup breadcrumbs (or flour if too runny)
*other times I have added: grated zucchini, mashed potato, crushed garlic, mashed broccoli

All ready to go
Here's what you do:
If baking meatballs, preheat your oven to 200C and grease an oven tray with a little olive oil. You will need to bake the meatballs for about 20 minutes. I pan fried mine in some olive oil over a hot plate over medium heat.

This recipe is great because almost all ingredients just need to be grated into a bowl. Mix all ingredients together with your hands and add more flour or breadcrumbs if too runny. Scoop teaspoon sized portions of the mix and roll into small balls. Repeat till all mixture is used. Once cooked, you can freeze what you don't eat but wait till they cool down first. I freeze them in batches of 4.

I cooked 3/4 packet of spaghetti which gave us 2 adult, 1 toddler & 2 lunch portions. To make the tomato sauce I lightly fried the remaining 1/2 of the onion used in the meatballs, added 2 cloves of crushed garlic, a tablespoon of chopped basil, a 700g bottle of Passata and a can of chopped tomatoes. I also had a heaped teaspoon of sugar and a little bit of worcestershire sauce. When the sauce is ready mix the pasta and meatballs all together.

Pizza Making 
Our pizza toppings


Fun pizza making

Saturday, October 8, 2011

Afgan Biscuits!

Yum - even with watery icing!
At the school I used to work at in Singapore we used to have a fantastic "Mum's Canteen". The mum's that ran it were the best and they made great food that always made me homesick for Australia. My all time favourite treat was Afghan biscuits. Years later I shared this story with my mother-in-law who promptly found a recipe and now makes them for me every time we visit home. Thank you Sandy! 


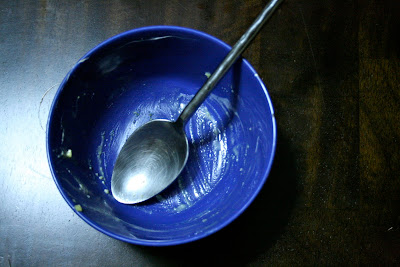
On this rainy Saturday morning I decided to make some Afghan biscuits with my 22 month son. We had lots of fun and obviously the best bit for him (and me) is licking the spoon at the end. He loved how crunchy the biscuits are and I just love them!


Keep your eyes on the mix!
Here's what you need for the biscuits:
200 g butter
1/2 cup sugar
1 1/2 cups plain flour
2 tablespoons cocoa powder
1 cup corn flakes, slightly crushed
1/2 cup desiccated coconut 


Here's what you need for the icing**:
1 cup icing sugar
1 tablespoon cocoa powder
2 tablespoons water
walnuts (to decorate if you want) 


Here's what you do:
Preheat oven to 180c and use baking paper to line some baking trays (I use pizza trays). When the butter is soft place it and the sugar in to your mixing bowl. I used my KitchenAid to cream it together until it was light and fluffy. In a separate bowl mix the flour and cocoa together. It is better to use a sifter but I am not sure if my son would have the patience for this so I just mixed them both straight from the packet. When mixed through add it to the butter and sugar mixture.


Lots of fun
Add the crushed cornflakes (my son had lots of fun helping with this) and the coconut to the bowl . Mix through until all blended well. Spoon teaspoon sized portions of batter onto your lined trays. It's important to know that the cookies won't spread or rise. If you want flat cookies be sure to press them down.  Bake in your oven for 15-20mins. This recipe made abut 24 small biscuits. When ready let cool then make the icing and ice. Traditionally afghan biscuits are served with a walnut decoration but also delicious on their own. Enjoy! 


**my icing turned out very watery. If you have a great recipe for icing please leave a comment and share!


Wednesday, August 24, 2011

change of ways...

I haven't been able to post any new recipes for a while as we have been on holiday for 7 weeks. Being teachers on the European school calendar means that we get to go home to Australia for an extended amount of time and visit family over winter. The holiday was great & fortunately/unfortunately I didn't do too much cooking - although I made a great sweet potato mash with orange juice!

Anyways, we are back home in Bangkok and getting back into our routine. I can't wait to get back into the kitchen and try out some of the recipes from my new birthday present cookbook from my mum, Hopscotch & Honey Joys. I LOVE this book and think I will buy it for others as a gift.

Also I have decided to expand my blogging and as well as cooking, I am going to share some of the crafty, fun things I do with my son. Now he is 20 months old we are having serious fun and I am tapping into the long-forgotten art & craft side of my brain. Upcoming activities (& posts) include wooden spoon puppets, coloured ice cubes to chase in the bath & maybe a cardbox box fort of some kind... still thinking on that one. In the meantime, below are some photos of the play kitchen I just made and I am off to explore my new cookbook and choose some new recipes to cook!

it started with a box

add some contact, cd's, plastic tubes & a bowl...

hours of fun!

Wednesday, June 1, 2011

Spinach & Mushroom Lasagna

last night's dinner
I decided to make a lasagna last minute and decided to use mince as well as spinach and mushrooms. My son ate it up so quickly and I liked it too but I think next time I will either make a traditional meat lasagna or a spinach, mushroom and ricotta one. Also, I ran out of sauce for the top layer so had to use tomato paste mixed with water which made it taste a bit too tomatoey. I always make too little sauce. Anyway, below is the recipe with the ingredients adjusted. It made 5 adult serves and 7 toddler serves which are perfect for freezing.


Here's what you need:
Always make a lot of sauce
700g minced beef
2 jars Passata tomato sauce 
1 brown onion diced finely
1 garlic clove crushed
1 punnet button mushrooms washed & sliced
2 cups spinach, blanched & sliced finely
1 tbspn sugar
1 tbspn Worcestershire 
olive oil
1 box dry lasagna sheets
Mozzarella & cheese grated - about 4-5 cups
2 bay leaves

Here's what you do:
Preheat oven to 180C. Heat the oil in a large saucepan and cook onion and garlic together until soft, about 3 mins. Add the mince and cook until brown. Add the mushrooms and stir. Pour in the 2 bottles of tomato and sauce and add some water to each bottle. Shake well and then add the water to the pan also. Add the sugar, Worcestershire sauce and bay leaves and stir well. Reduce the stove heat and cover pan with lid. Leave to cook for about 10-15mins, stir occasionally. Add the spinach and stir through.

When the sauce is ready remove from heat and scoop out the bay leaves. Coat the base of a deep oven dish with a layer of sauce which will stop the lasagna sheets from sticking. cover with a layer of dry lasagna sheets. Use a large kitchen spoon and cover sheets with sauce. make sure to cover the sheets well, especially the corners as these will dry out. Sprinkle grated cheese over the sauce generously and if you have any left over spinach you can add now too. Cover with another layer of lasagna sheets and repeat the sauce/cheese process. I managed to get 4 layers.

Cover the top layer with the remaining sauce and top generously with cheese. Cover the oven dish with foil and place in the oven for 25 minutes. When ready, remove the foil and cook for a further 10 minutes. Enjoy!

Monday, May 23, 2011

Creamy Chicken Nuggets - Super Delicious!

Our favourite chicken nuggets
These chicken nuggets are a favourite of everyone in the house. I always make so many but still it is hard to save any for freezing because they get eaten too quickly. The recipe is adapted from Annabel Karmel's The Fussy Eater's Recipe Book which is one of my favourite children (and adult!) cook books. The secret is in the soaking of the chicken and adding the parmesan to the breadcrumbs. I cooked these for friends and one said it was like eating mashed potato, they were that soft. I also made a mustard sauce which is a nice change from the standard tomato.

Here's what you need:
Preparing to crumb the chicken
2 chicken breast, cut into 2cm cubes
200ml milk
1 tbspn lemon juice
1tspn Worcestershire sauce
1 tspn soy sauce
1/4 tspn paprika (if you want)
100g plain flour
1 beaten egg
75g breadcrumbs
45g grated parmesan cheese
4 tbspn canola oil

Here's what you do:
Place the cut chicken in a bowl and cover with the milk, lemon, Worcestershire, soy and paprika. Stir through, cover with cling wrap and leave in the fridge for at least 2 hours or longer. When you're ready to coat the chicken, strain the marinade off the chicken. Lay out the flour, egg and breadcrumbs. Add the parmesan cheese to the bread crumbs and mix through. Coat the chicken in flour, dip in egg and then coat with breadcrumb/cheese mix. Repeat until all pieces are coated.

Heat the oil in a frying pan and fry on high for about 2-3 minutes. I used olive oil as I had no canola. Make sure to turn the nuggets over and keep an eye on them as they cook quickly. When cooked, place on paper towel to the side and repeat until all are cooked.

I also decided to make the mustard dipping sauce suggested in the recipe book and Oscar loved it. It is so quick and easy. Below is what you need and what to do.

Honey Mustard Dip
4 tbspn mayonnaise
1 tspn Dijon mustard
1 1/2 tspn honey
1 tspn cold water

Mix all the ingredients in a small dish, I used a ramekin. That's it! Stir the ingredients well and keep in fridge. Enjoy!

Crustless Apple Pie with Cinnamon

Crustless apple pie
I've been making this apple pie since my son was about 7 months and he loves it, in fact we all do. Super easy and healthy I usually make about 4 pies and freeze them to use later.

I should be more adventurous and make one with a crust but I've already made a lemon pie and this apple pie works every time.


Cook the apples for 15 mins
Here's what you need:
6 apples, peeled & cored. I used Granny Smith.
1 egg yolk
2-3 cinnamon sticks
1/4 cup brown sugar
1 tbspn lemon juice
ground cinnamon

Here's what you do:
Mix in the egg & sugar
Preheat your oven to 180C. Cook the apples in boiling water with the cinnamon sticks and lemon juice until soft (about 15 minutes). Drain well and add the apple to your food processor. Mix to the consistency you like, I puree it all.

Add in the egg yolk and sugar and mix again. Pour mix into 4 ramekin dishes, about 2/3 high, even out the surface and sprinkle with ground cinnamon. Bake in the oven for 20mins. When cooled, cover with cling wrap and freeze or eat straight away with ice-cream. Enjoy!

Wednesday, May 18, 2011

Roasted Pumpkin Sauce with Fettuccine

Pumpkin sauce pasta
This is one of my all time favourite pasta sauces and dinners. So easy and tasty. The best part about it is that you can add to the sauce. Next time I might add some fried bacon and pine nuts, even pesto. You can even use the sauce to stuff portobello mushrooms. The recipe was adapted from the Family Circle Quick Pasta Cookbook and originally says to use pappardelle pasta but I couldn't find any so used regular fettucine. The recipe also says to use butternut pumpkin but as I live in Thailand it was a lot cheaper for me to use chinese pumpkin and it still tasted great. I cooked the whole packet of pasta and it served 2 adults and 3 toddler serves.

Bake for 30mins
Here's what you need:
1 packet of pasta (papperdelle recommended)
1.4kg pumpkin, deseeded, cut in 2cm chunks
4 garlic cloves, crushed
100ml olive oil
3 tablespoons thyme leaves
salt to season
3/4 cup hot stock (vegetable or chicken)
2 tablespoons cream
Parmesan, grated to season at end

Here's what you do:
Preheat your oven to 200C and place water in a pan for the pasta and bring to the boil. Cut your pumpkin into 2cm chunks with the skin and seeds removed. Place in a baking tray and coat with the crushed garlic, thyme leaves and 60ml of the olive oil. Season with salt and place in the oven for 30mins. Place the pasta in the salted, boiling water and cook for about 12mins. When cooked, drain and pour the remaining 40ml of olive oil through the pasta. Keep the pasta warm.

Take the pumpkin out of the oven and place all contents of the baking tray in a Magimix or other food processor. Add the hot stock and cream and mix together. Pour the sauce over the pasta and stir through. That's it! Serve topped with parmesan cheese and thyme leaves if you want. Enjoy!

Tuesday, May 10, 2011

Chicken Parmigiana & Jamie Oliver Potatoes/Carrots

Nothing fancy but tasty just the same
I haven't cooked dinner for nearly a week. Finishing off a university assignment and enjoying Mother's Day weekend seemed to zap all my time and energy. Lucky I have a stock of meals for Oscar in the freezer and for us, well take away pizza, cheese on toast, and whatever we can eat standing at the fridge door has been our dinner! So tonight I am making amends. Nothing fancy, probably not blog-worthy but here it is anyway.

I love Jamie Oliver's cookbooks and enjoy watching his 30 minute meal shows. On the weekend (while eating cheese & crackers for dinner) I decided to give his herb 'roasted' potatoes and glazed carrots a try. We're having them with a chicken parmigiana and whatever vegetables are in the fridge to steam, cauliflower and broccoli.

Prepare it earlier to save time
Here's what you need - Chicken Parmigiana
chicken breast (I needed 3)
flour to coat chicken (about 1/2 cup)
1 lightly beaten egg
1 cup flour
1/2 cup grated parmesan
1 tbspn chopped parsley (if you like)
1 bottle pasta sauce or whole tomatoes in can
grated mozzarella cheese
olive oil

Vegetables cooking away
Here's what you need - Potatoes & Carrots
500g potatoes (I used 2 large brushed potatoes)
1 lemon (use a potato peeler to shave off the zest)
4 sprigs of fresh thyme & rosemary
1 bulb of garlic, unpeeled
1 large carrot, wash, peeled, cut into stalks
small knob of butter
2-3 bay leaves
2 tspn sugar

Chicken in the oven
Here's what you do - Chicken
Heat the oven to 180C. Press down the chicken breast with your hands to flatten it out. Combine the parmesan and breadcrumbs with the parsley in a bowl. Coat the chicken in flour, dip and coat in egg and then cover with the cheesy breadcrumbs. For my son's chicken I cut the breast in half horizontally so it is not as thick. Heat the olive oil in a fry pan and lightly fry each side of the chicken until it is golden. Drain on kitchen paper. (I prepared the chicken during the day and kept it in the fridge to save time).

When you're ready to cook the chicken, place the cooked chicken on a baking try lined with foil. Pour over your pasta sauce generously and top with grated mozzarella. I probably put too much cheese put better too much than too little in my opinion. Bake in the oven for about 10-15mins.

Vegetables
During the day when I prepared the chicken I also steamed some cauliflower and broccoli and kept it in the fridge. It's just one less thing to think about at dinner time and I reheated them when I was ready to serve. I followed Jamie's recipe and instructions to the letter and the results were pretty good.

Boil the kettle and heat a fry pan on high. Put the cut potatoes in the pan and cover with boiling water from the kettle. I didn't cover mine with a lid. Cook on high for about 10mins or until the potato breaks apart with a knife easily.

Boil the kettle again and put the carrots in a sauce pan. Pour the boiling water over, add a few twigs of thyme, sugar, pinch of salt, bay leaves and a lug of olive oil. Leave cooking on high.

Seasonings
Once the potatoes are ready, drain them, return the pan to the heat and warm up some olive oil. Let the potatoes steam in colander for a few minutes. Add the potatoes to the olive oil and lay them out flat. Add your unpeeled bulb of garlic a clove at a time and grate in your lemon zest. Add a knob of butter and toss on high heat for a few minutes. Turn the heat low and continue tossing for a few minutes more. Tear in some rosemary and toss a few more times. They should go golden in colour.

Drain the carrots then pour a little olive oil and sprinkle some salt over them. Take the chicken out of the oven and serve up with all the vegetables. I needed to add a bit of salt to my dinner. Enjoy!

Apple & Carrot Muffins

Crunchy carrot & apple muffins
This recipe came across my Twitter feed a few days ago and comes from this website. It caught my eye because of the carrot. Carrot in muffins? It all sounded too healthy for me as I prefer chocolate sweets like this slice and or these wontons. But as I like Oscar to eat healthy snacks I decided to try them.

I also decided to stick to the recipe completed. I was tempted to leave out the sugar and salt, and add half the uneaten banana Oscar left on the bench but as it's my first time making them I wanted to know what they should taste like before I experiment. The recipe made exactly 12 medium muffins and I've put some in the freezer.

Combine wet & dry ingredients in separate bowls
Here's what you need:
1 1/4 cup wholewheat flour
1/4 cup sugar
1 tspn cinnamon
1/2 tspn baking powder
1/2 tpsn baking soda
1/4 tspn salt
1 cup grated carrot (I grated it fine)
1/2 cup apple sauce
2 lighly beaten eggs
1/4 cup milk
1/4 cup canola oil
1 tspn vanilla extract

Here's what you do:
Preheat oven to 180C and grease a muffin tray. Mix together all the dry ingredients in one bowl (flour, sugar, cinnamon, powder, soda, salt). In a separate bowl mix together all the other ingredients. Add half the 'wet' ingredients to the bowl with the dry mix. Blend together well, then mix in the other half of wet ingredients. Fill each muffin hole to 2/3 and bake in the oven for 20mins. They didn't rise as high as I thought they might but are actually quite nice, even a little crunchy. I would eat them warm, enjoy!

Wednesday, May 4, 2011

Ricotta & Spinach Pasta Bake

I think one of the reasons I find the slow cooker so boring is that I like to use my hands when cooking. This pasta bake is perfect because you get to mix the cheese and spinach and fill the pasta shells. If my son wasn't sleeping I would have let him have a go at stuffing the shells. The best part about him being asleep is that I can get dinner ready quickly, ahead of time, and without him clinging to my leg asking for some "cheeeeessse".

This recipe comes from the Women's Weekly Healthy Babies Cookbook. I've made it before and Oscar (and us) loved it. He normally has 4-5 pasta shells for dinner. The original recipe says to use 32 pasta shells but, being a big eater, I always use more and then always have too much left over and the pasta ends up being squashed all on top of each other. I swear next time I will only use 32 shells, but that's what I said last time!

Preparations
Here's what you need:
32 large pasta shells
500g spinach, trimmed
600g low-fat ricotta cheese
2 tbspn finely chopped flat parsley
700g tomato pasta sauce (I use Passatta as it's exactly 700g per bottle)
1/2 cup or 125 ml chicken* stock (I used home made stock today from the freezer)
2 tbspn finely grated parmesan cheese (or you could try with other type)
*use vegetable stock to make recipe vegetarian

Here's what you do:
Preheat the oven to 180C. Bring a large saucepan of salted water to boiling point and then add your pasta shells. Cook for 3 minutes only as you want them to stay firm, When done, drain and let them cool down. Chop the parsley and boil or steam the spinach, drain and squeeze out the excess water.

Ready to be covered with foil
In a bowl, add the ricotta, spinach and parsley and using your hands mix all together. In an oven proof dish, pour the tomato sauce and chicken stock and mix together with a spoon. Use your hands to stuff each pasta shell with the ricotta mix. Fill each shell quite full. Place the shell in the dish and repeat. When done sprinkle the top with parmesan cheese and cover the dish with foil.

Bake in the oven for 50 minutes and then remove the foil and bake for another 10 minutes. Leave it to cool for a bit before serving and you can scoop up some of the sauce to pour over the shells. Enjoy!

Tuesday, May 3, 2011

Sweet Potato & Chicken Stew - Slow Cooker

Sweet Potato & Chicken Stew
Ok, last year I bought my husband a slow cooker for Father's Day. Some might say that is a lame present but I also bought him some of those waterproof travel bags you can take kayaking etc so I think it balanced out. Since the date of purchase however we have used the slow cooker a grand total of... once, and I can't even remember what we made.

The reason for this is because I am a slow cooker skeptic. I just don't understand how it all works and find it hard to believe that in 7 hours all those raw ingredients will produce a beautiful stew. It also doesn't help that I look through the glass lid every 20 minutes or so and see that nothing has happened.

I find it a bit boring BUT can see the enormous benefits. So today I decided to take out the slow cooker and give a new recipe a try. Nothing too fancy but delicious just the same and it allowed me to indulge my sweet potato/kumara obsession. The recipe below would serve 4.


Here's what you need:
2 medium orange sweet potatoes, peeled & cut into chunks
2 brushed potatoes, peeled & cut into quarters
everything in
2 medium carrots, peeled & cut in chunks
6 chicken drumsticks, skin removed (or as many as you need)
2 garlic cloves, crushed
1 cup chicken stock (I used store bought because I was lazy)
1 can of whole tomatoes
2 tbspn flour
2 tbspn fresh thyme
salt to your liking (I didn't salt mine but should have)

7 hours to go
Here's what you do:
Put everything in the slow cooker and give it a quick stir. Put the lid on and set the time for 7 1/2 hours and cook on low. If you want it faster set cook temperature to high for 5 hours. How easy is that!

We made some rice in the rice cooker to serve it with when time was up. I shredded the chicken from the bone (it just fell off), scooped up the vegetables and poured some of the stew over it all. My son ate it up as well and it was pretty tasty. Enjoy!

Coconut Chocolate Slice (egg free)

Won't last long
I made this slice to bring to lunch with friends today and also because it's one of my favourite slices. It is the first slice I ever made as teenager. I have no idea where the recipe comes from but I haven't changed it throughout the years. I was tempted to add some crushed cornflakes just for a change but I just love it the way it is. Apparently the recipe makes 30 pieces but I tend to cut the slice into bigger portions and it is usually all gone in 2 days! This recipe made 24 pieces (well ok, about 28, but there are now 24 in the container).

Here's what you need for slice:
1.5 cup flour (I used self-raising, but have used plain before. I might use wholewheat next time)
1 cup brown sugar (you can use caster sugar too)
1/3 cup cocoa powder
1 1/3 cup dessicated coconut
240g, melted & cooled butter (it's important to let the butter cool before adding)
1 tsp vanilla extract

Pat the mix down evenly
For the icing:
2 cups icing sugar
1/3 cup cocoa powder
60g melted butter
2-3 tbspn hot water

Here's what you do:
Preheat the oven to 180C, grease & line a baking tray and melt the butter. Set the butter aside for it to cool. Mix all the dry ingredients in a bowl. Keep turning the mix over, making sure to blend the ingredients well. When the butter is cool add it and the vanilla extract. I stir the butter in for a bit but then use my hands to mix everything together. Use your hands to place the mix in your tray and spread out evenly. Bake for about 15-20mins, or place a toothpick in and when it's clean, take it out.

Leave the slice to cool completely, Make and spread the icing out and then sprinkle with coconut on the top. Cut into servings. I keep the slice in a tupperware container in the fridge due to the heat. If you have any variations to this recipe I'd love to know. Enjoy!

an old favourite

Monday, May 2, 2011

Strawberry, Banana & Yoghurt Popsicles!

It is sweltering hot here in Bangkok at the moment (90% humidity nearly every day) and motivated by my $1 popsicle container purchase the other day I decided to make these fruity popsicles before I went to bed last night. Super easy, super healthy and perfect for this type of weather. The ingredients below made 8 popsicles.

Here's what I used:
1 punnet of small strawberries
2 large bananas
1 cup of natural greek yoghurt


Here's what you do:
Wash the strawberries and cut the green tops off. Cut the strawberries in half and place in 1/4 cup of water on the stove for about 5 minutes to soften them up. While they are softening up, peel your bananas and slice. In a blender or Magimix, place the strawberries, banana and 1 cup of yoghurt and blend till the mix is smooth. Pour the mix almost to the top of your popsicle container (remember to leave some room at the top as it will expand in the freezer). Put in the freezer and leave for at least 4 hours or better yet, overnight.

This morning I ran some tap water underneath the popsicle containers to make it easier to pull them out. I think a silicone container would be easier but I have not seen any in the shops. These were a bit too cold for my son so I happily finished it off for him. Enjoy!


Sunday, May 1, 2011

Stress free Lunch Platter!

Lunch time!
Today was the last day of my in-laws holiday in Bangkok so we decided to have a lunch at home. While Oscar was sleeping and everyone else was watching the football I went and investigated the contents of the fridge and decided to just put everything out and eat tapas style.

I had no intention of posting this lunch platter on the blog but when my husband saw the tray the first comment he made was, "did you take a photo? Put this on your blog". So he took a photo for me and here it is. The platter would easily feed 5 people.

Here's what was on the platter:
* 3 boiled eggs sliced
* dukkah with olive oil & balsamic vinegar
* avocado sliced
* salami & ham slices
* sliced tomato
* slice cucumber
* mixed salad leaves
* mixed slice breads
* portobello mushroom with cornflake & pesto topping (see below for directions)
* eggplant/aubergine stack topped with prosciutto on toasted bread (see below for directions)
* blue cheese, sliced Montgomery Jack,  & white castello (my favourite)

Here's what you do:
* Eggplant/aubergine: wash, top and tail the eggplant. Slice the eggplant into 10 slices. Heat olive oil in a frypan and lightly fry each slice. You'll know the eggplant is ready when it goes almost see-through. When done place on kitchen sorbent paper. Place a little prosciutto on top of each slice and then stack one on top the other. Place on a piece of toasted bread.

* Portobello mushrooms: preheat the oven to 180C. Wash the mushrooms and cut the stems off. Place bottom side up on a baking tray and bake in the oven for 5 mins. While they're in the oven, mix together the filling, recipe here. Take the mushrooms out and place the filling in. Bake in the oven for a further 10 mins. Enjoy lunch!

Delicious!

Wednesday, April 27, 2011

**Lemon Pie** (mum-in-law's recipe) DELICIOUS! DELICIOUS!

Seriously delicious!
As we live in Thailand throughout the year I create a list of all the things I will eat (and do) when we visit home, Australia, for our holiday. Definitely in my top 3 eat list is my mother-in-law Sandy's Lemon Pie. I seriously LOVE this pie and literally wait all year for a slice (or 5!). So I was excited knowing that Sandy was coming to visit us here in Bangkok and now that I have a food blog I decided to challenge myself and ask Sandy to walk me through the recipe. Keep in mind that I have NEVER, EVER, made pastry from scratch before but how hard could it be...


Here's what you need for the pastry:
200g plain flour
Oscar inspecting the pastry and filling
130grams butter (room temperature)
70g caster sugar
1 egg

Here's what you need for the filling:
4 lemons zested
250ml fresh lemon juice (from the ones you zested)
9 eggs
375g caster sugar
300ml cream

Here's what you do: (I tried to take lots of photos to document my experience)

Prepare the pastry and filling first thing in the morning. I prepared everything at 7:30am and then cooked it later the same day at 7pm. As I live in Bangkok though the humidity is so bad at the moment that it was better for the pastry to be made early. You can use your hands or a processor to make the pastry. I used my KitchenAid, Sandy always uses her Magimix.

Pastry #1: 
Combine the sugar and flour mixture and then add the butter. After about 30 seconds mixing, add the egg. Combine ingredients until it has formed a smooth dough. Take out of the bowl and roll in to a ball. Cover with cling wrap and place in the fridge for at least 1-3 hours or overnight if you wish. It will feel like it has turned rock hard but that's ok. This is the easy part I discovered!

Love my juicer
Filling:
Zest and juice the lemons (this was my least favourite part). I was happy to bring out my awesome juicer that we picked up in Turkey. Mix the eggs, cream, sugar, juice and zest all together. I used the whisk component of my KitchenAid. Pour mixture in a tupperware container or keep in bowl and place in the fridge for a few hours or overnight.

Pastry/Filling #2:
It's now 6pm so pastry has been sitting in the fridge for about 10 hours. Preheat your oven to 160C and take out the pastry ball and lemon filling. Generously flour a surface on your kitchen bench and gently pat and roll your pastry. Use a floured rolling pin, start at the centre to roll the pastry out into a circular shape a bit bigger than your pie dish. You might have to stop regularly and piece the pastry back together on the side. Make sure it's not rolled too thin and keep adding flour under the pastry to stop it sticking.

Oh dear...
Now... the tricky part!!! Carefully pick up your pastry and line a deep pie dish. As you can see from the photo I need a lot of help in this department! What a mess! We had a good laugh, blamed it on the humidity and set about piecing the pastry back together again. I knew there was a reason I have never made pasty before!

Patched all up, looks great


If you're lucky then yours would have stayed together nicely and ended up looking like this photo to the right. Now that the pastry is covering the base and edges of the dish, line the base with baking paper and bake at 160C. I covered the baking paper with pie weights (ceramic balls - gift from Sandy). Bake the pastry for about 10minutes, but maybe less, check on it and once it is slightly brown take it out of the oven, discard the baking paper and store the pie weights.

Reduce the oven temperature to 150C. You might want to use a sieve to pour your filling through before baking. Sandy sometimes leaves the zest in but sometimes sifts it out, up to you. We poured it through a sieve first. Evenly pour the lemon filling around the pastry but not up to brim, leave about 3/4 cm gap or a bit more from the top. If you have left over filling pour these into greased ramekin bowls and bake at the same time. These can be crustless pies! Now....so super carefully carry the dish to the oven.


Bake the pie at 150C for approximately 45mins-1hr. Mine cooked faster than I thought, check it by gently pressing the centre. It should be spongy and rise back when pressed.

Take it out of the oven and serve with ice-cream or just cream. Seriously delicious and no where near as hard as I thought. I felt like a Masterchef contestant afterwards and so proud of myself! THANK YOU SANDY! xoxo
No leftovers - ever!